The Video Contest Template is part of our popular suite of Contest Templates. Created to meet popular demand, the Video Contest Template was made to help you create video contests quickly, and curate them easily.
Please Be Advised: We track votes using cookies. Internet-savvy fans can clear their cookies and violate voting restrictions (i.e. voting more than once per hour). I recommend reserving to right to delete photo entries that are suspected of cheating in your contest rules.
Here, we will take a closer look at the Video Contest Template, its features, and how to customize the template to fit your needs!
Note: We here at Heyo are constantly trying to improve our templates, and, as such, these overviews are subject to change.
Like all of our Contest Templates, the Video Contest template comes packed with easy-to-customize widgets and mobile optimization that will propel your giveaway to success. As a prebuilt template, we’ve done the hard part for you, and created a mobile optimized version of your campaign.
Video Contest Template features include:
To use the Video Contest Template, open the Contest Templates section under the Templates tab. This will bring up a selection of Contest Templates to choose from. The Video Contest Template should be the last option on that list. Once you’ve selected the Video Contest Template, be sure to click ‘Save and Continue’ before moving on.
This will take you to the Heyo Editor. You can customize the widgets on the Video Contest Template, simply by clicking on a widget and editing the widget options that open on the right-hand side of the screen. Each widget that can be edited will be highlighted in green when you select it.
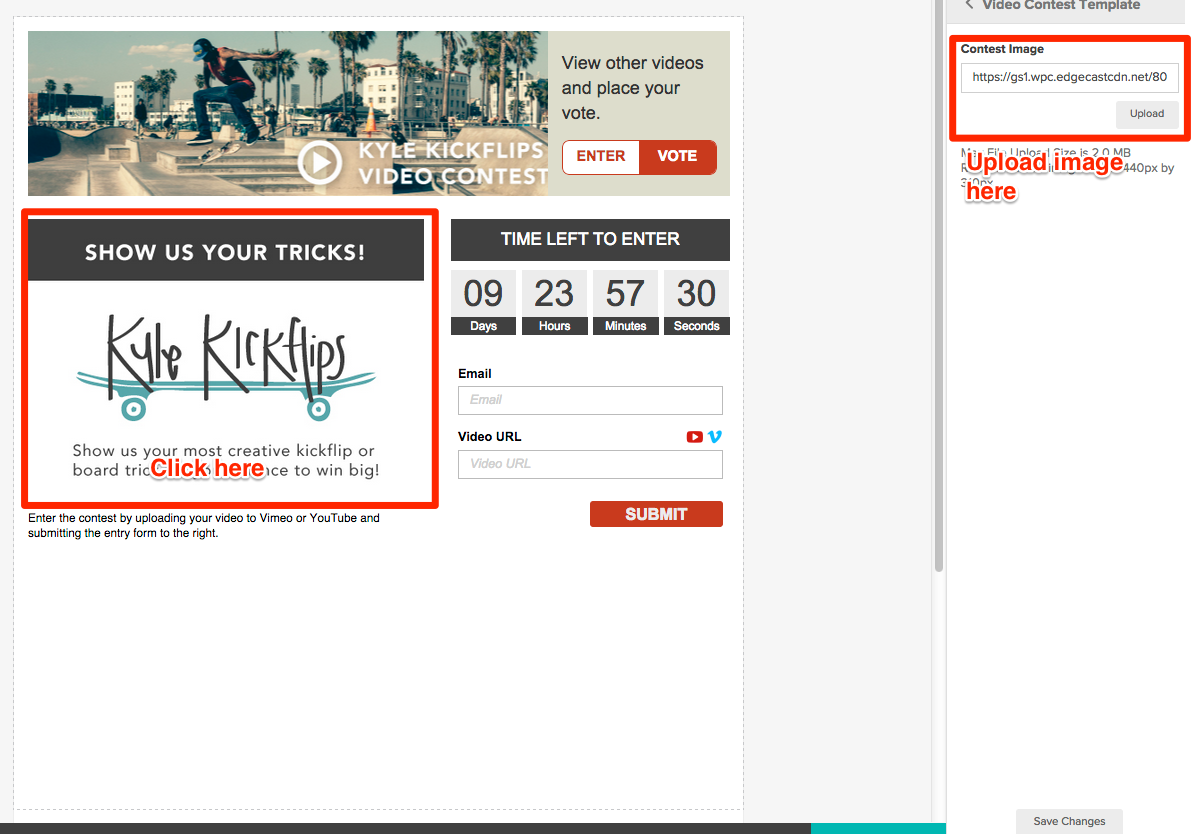
First, let’s change the Hero Image. Start by clicking on the image to open up the widget options on the right.
 The recommended image size is 440px by 310px, the image should be a JPG or PNG file, and the file size limit is 2MB. If your image is larger than that, consider resizing the image using Photoshop or pixlr.com.
Once you have created your image, click ‘Upload’ in the widget options. Select the image you want to upload and then click ‘Save Changes’ at the bottom of the screen.
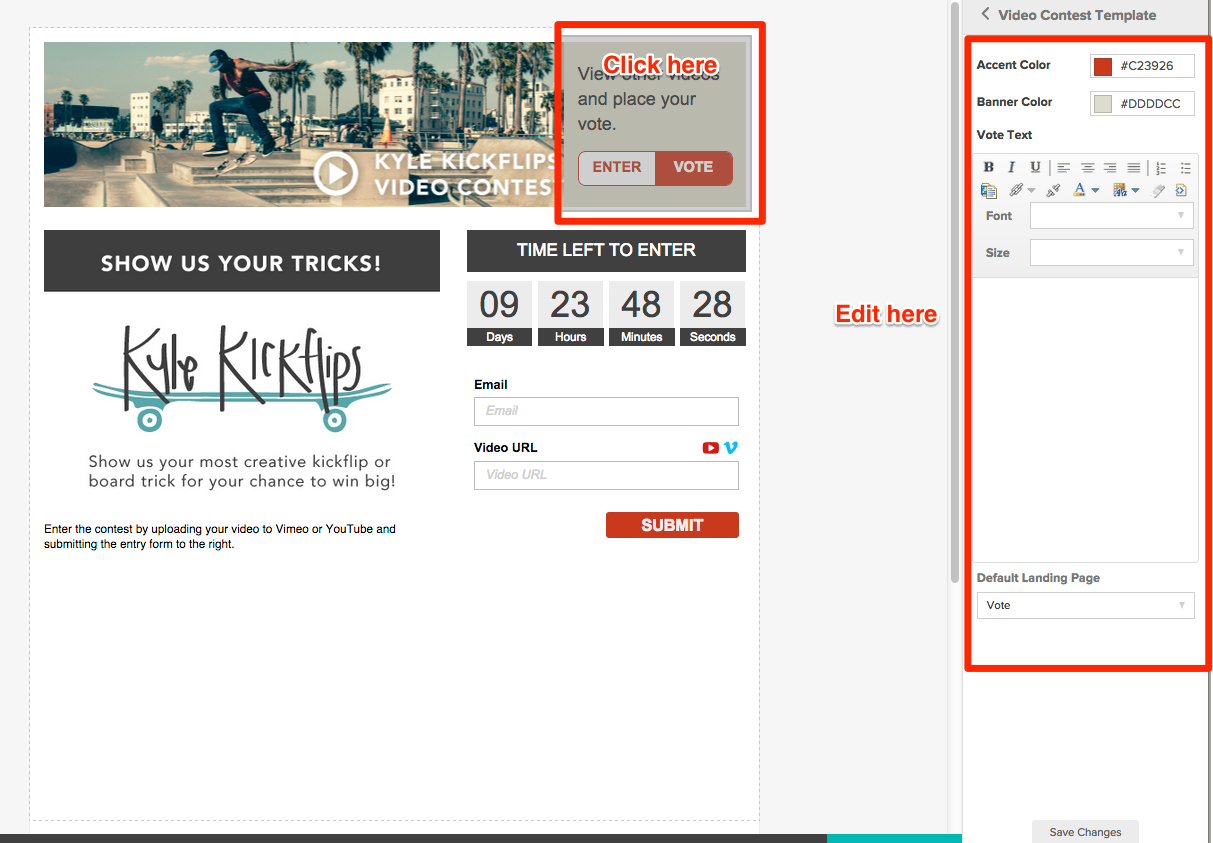
The Video Contest Template also gives you a banner image to play around with. To change this image, just click on the banner to open up the options and upload your photo. The recommended size for this image is 578px by 183px, and the file size limit is 2MB.
You can also change the text and accent color in the banner by clicking on the text to open up the text editor, and clicking on the Enter/Vote button to edit the accent color using the color picker. The accent color controls both the Enter/Vote button’s color and the color of the submission button on the entry form. You can edit the text, as well as choose the default landing page (enter screen or vote screen).
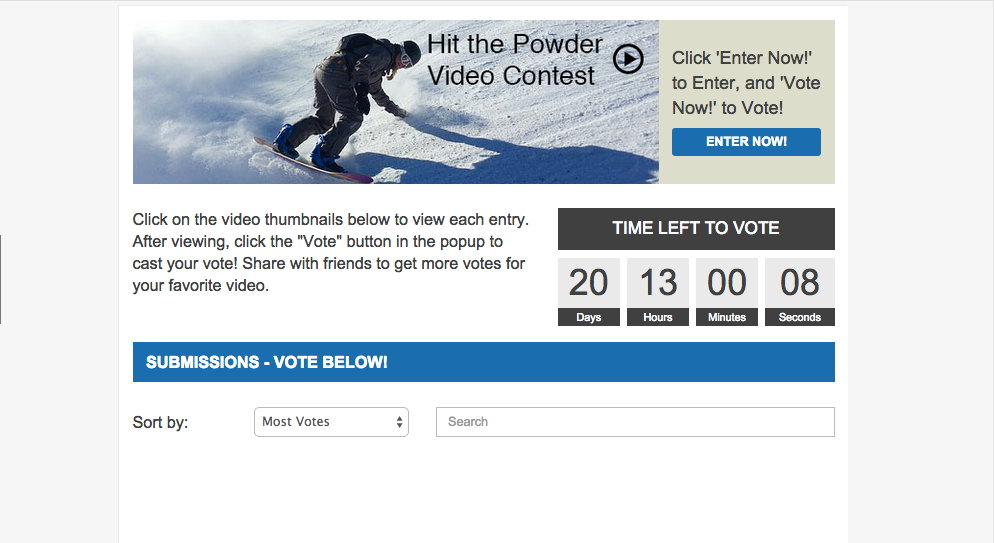
 Note: Clicking on the ‘Vote Now!’ button does NOT open the voting page. All changes made to the Entry page will carry over to the Voting page automatically.
Next, let’s move on to the text under the Contest Image; this area is usually used to explain the rules of the contest. To edit the text, click on the text on the campaign canvas to open up the widget options.
Note: You do not type directly onto the campaign canvas. A text editor will open up in the widget options on the right hand side of the screen. You can type in this text box and change the text appearance in this editor.
When you’re done editing the text, click ‘Save Changes’ to continue.
Let’s turn our attention to the Countdown Widget. You can change the ending date and time for Entries and Voting by clicking on the Countdown Clock and editing the options on the right side of the screen.
Note: You can now change the text on the Countdown widget. This is great if you want to customize it, or if you need to change the language from English.
You can also edit the frequency at which people can vote per hour. Click ‘Save Changes’ to save the Countdown clock.
Next up is the email Form. If you use MailChimp, AWeber, Campaign Monitor, or Constant Contact to collect emails, you can connect those services to the form by clicking on the widget and selecting the service you wish to connect.
If you use a different email collection service, or you don’t have a service at all, not to worry! Heyo collects the emails from the Video Contest Template into a CSV file for you, which you can download at any time from the Heyo Dashboard.

Once you’ve customized every widget on the template, be sure to check out the ‘Options’ tab on the upper right-hand side of the screen.
Here is where you can customize the Meta Data that appears on Facebook for your campaign, as well as add Tracking Script to track stats specific to your campaign. You also have the ability to add Google Analytics to your campaign – instructions on how to use these options can be found here.
You can customize the background of the Video Contest Template. You can upload a background image using, select a background color using the Heyo Color Picker, or select one of Heyo’s preset backgrounds.
The Voting Page changes with the edits to the entry page, so you won’t have to go through and design a separate template. To see the Voting page, just click ‘Save and Preview.’ The Voting page will display by default.
 When you’re ready to publish your video contest, publication instructions can be found here!
Is there an issue I didn’t cover in this overview? Contact us at support@heyo.com and we’ll help you out.