Contests work well when you want to increase your brand engagement with your fans. It involves both entry submission and voting. Here, we will take a closer look at the Photo Contest Template, its features, and how to customize the template to fit your needs!
Our photo contest template is responsive, which means they work well in all devices. Our Photo Contest Template includes below features:
After the successful signup / login click on “Create New Campaign” button and then select one of the Photo Contest template from the list of available templates list.
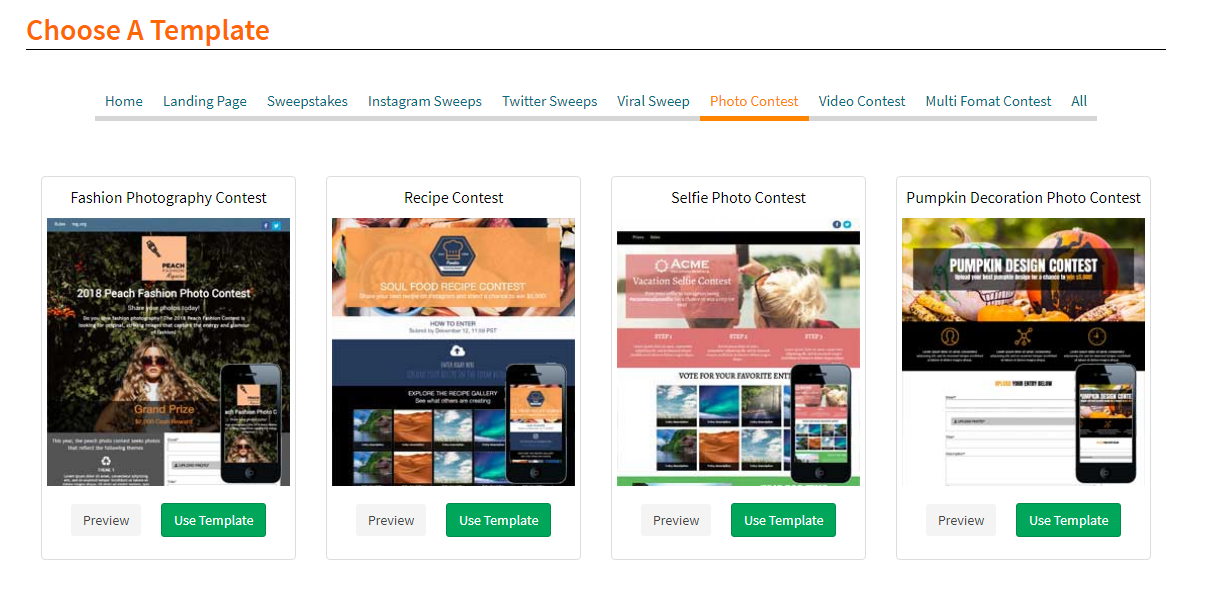
Click on “Preview” button to see how campaign looks. Once you’re decided with the template, click on “Use Template” button. The moment you select the template, you will be landed in our new campaign editor tool, where you can customize all the sections of the campaign.

The new design editor is simple and easy to use, it offers customization of both landing and confirmation pages. Simply click on “Home Page” dropdown and select “Confirmation Page” to customize the confirmation page of your photo contest.
Everything you see in our design editor is a widget. You can always edit an existing widget by simply mouse over on it.
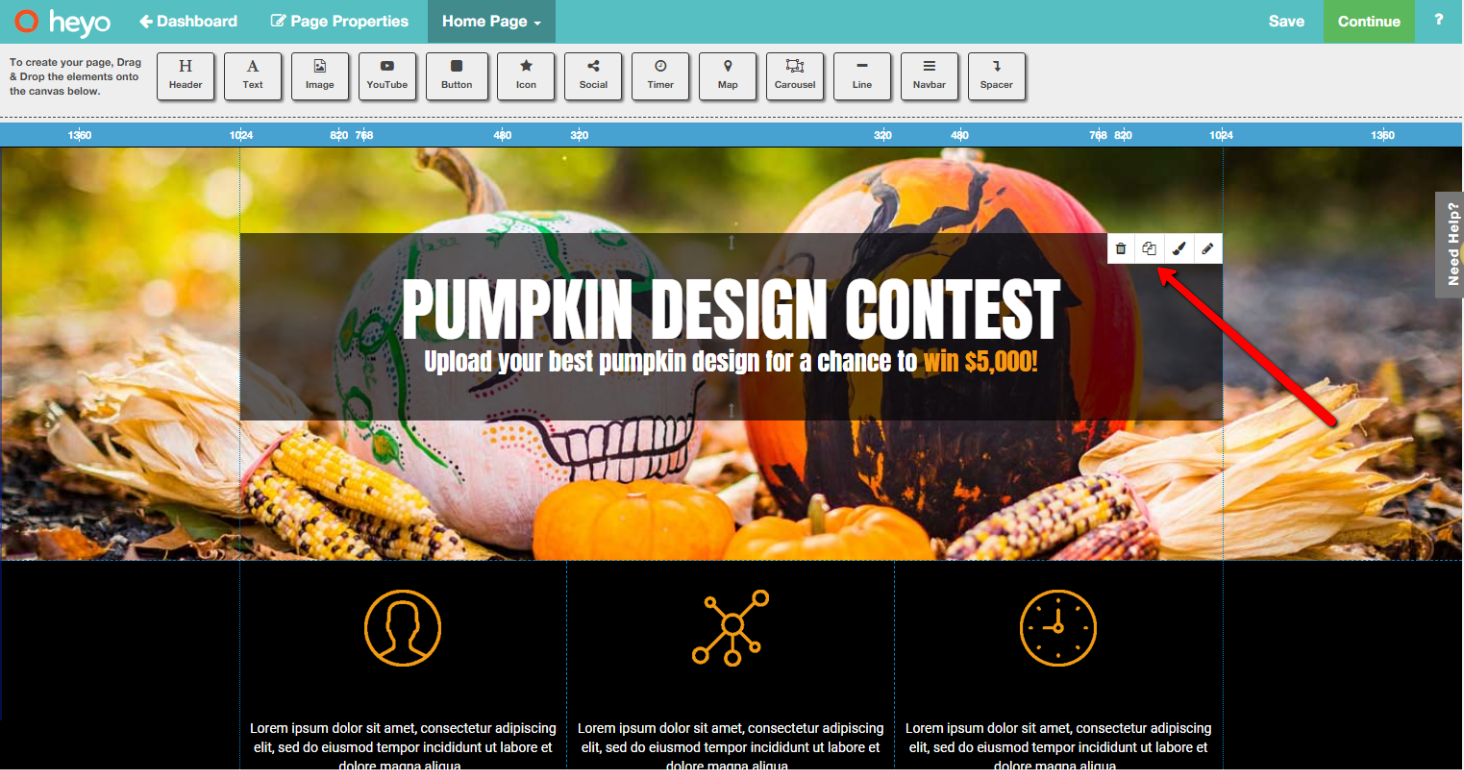
And if you would like to add any new widget to the campaign, you can always do it by simply drag a widget from the header navigation and drop it in one of the column in your campaign.
The contest landing page is divided into multiple rows and each row has multiple columns. You can also add additional columns or rows to the campaigns by clicking on “Add New Section” button which is located at the bottom of the campaign. And you can always delete the preloaded sections (rows) from your campaign if it requires.
You can add new form fields, edit the existing fields and even remove them from the Entry submission form. To edit the form, mouseover on the Form section and click on pencil icon which will bring up the “Form Settings” section at the top of editor.

Click on “Add / Edit Fields” button to edit the form fields. You can not only change the form fields but also change the form background settings and form field label colors. For every form field, you can set below options:
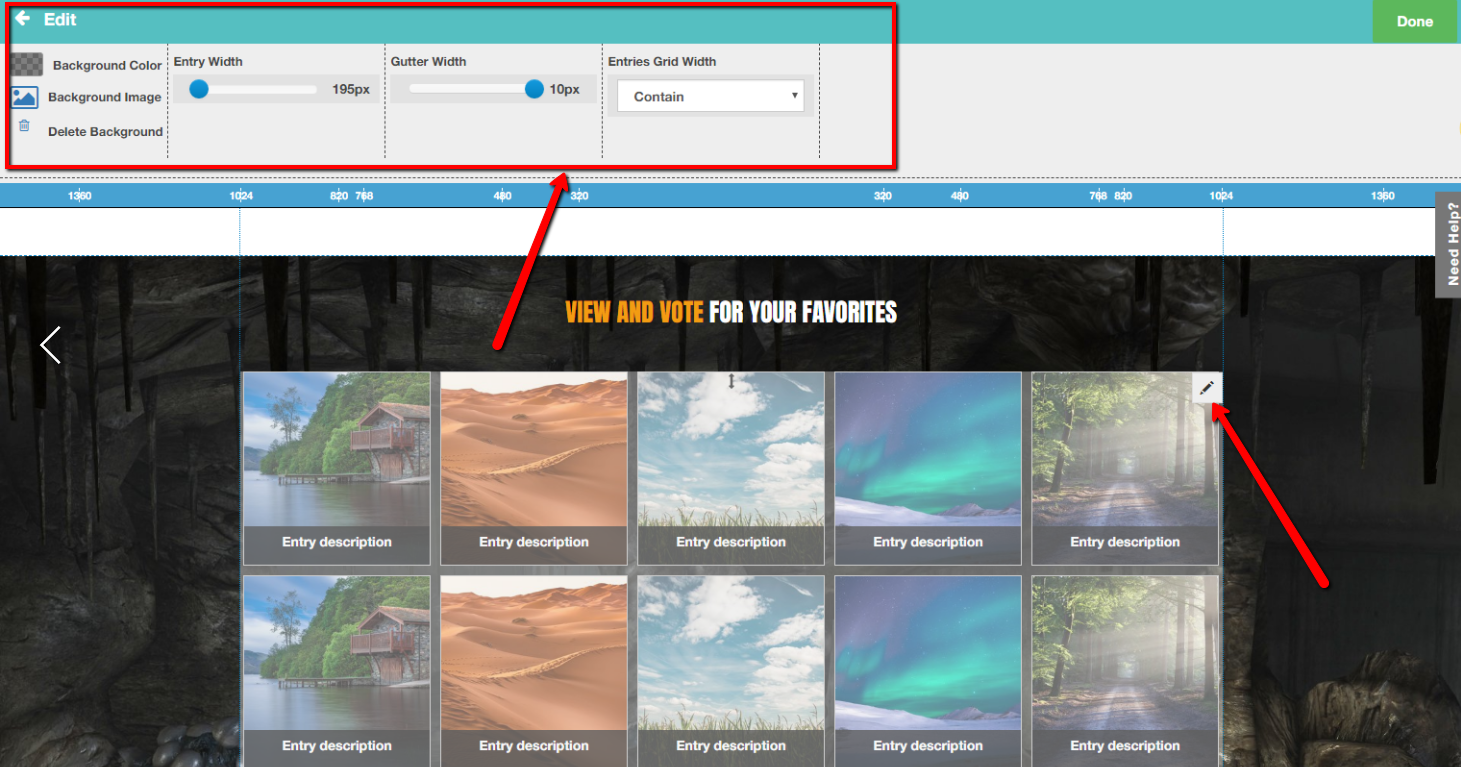
User submitted photo entries will get displayed on the landing page itself and you can customize the entries layout by mouse over on Gallery widget and clicking on pencil icon. You can change the gallery background, individual entry width, space between entries(Gutter Width) and the entire display of gallery.
Within the campaign editor, you can check how your campaign looks on different devices by clicking on the different dimensions on the ruler, which is located at the top navigation.

Once you’ve edited the photo contest landing page click on “Continue” button on the header navigation which will take you to the confirmation page editor where you can edit the confirmation page of your promotion.
After you click on “Continue” button on the header navigation of confirmation page editor, you’ll be landed in the settings page. Here you can give a name to your campaign and set start and end dates for your campaign along with a specific timezone.
Check the “Hide the campaign until the Start Date/Time” flag, if you don’t want your campaign to be accessed by anyone before the start date.

Under Entry Settings section, you can set submission start and end dates along with entry limit for your campaign. You’ve total control on how frequently users can submit their entry into your campaign.
Under Vote settings section, you can set voting start and end date. You can even disable voting for your campaign by setting “Enable Voting” to “No”.
You can also add a Facebook like-gate for your campaign under Eligibility section by clicking on “Asks users to “like” your Facebook page before they can enter.” flag and adding your Facebook page.
Select “Prescreen Submission” checkbox, if you don’t want entries to get displayed on the app by default. When you enable prescreen submission flag, all the entries submitted by the entrants will get displayed in the moderate page and will only get displayed when you approve them from the admin tool.
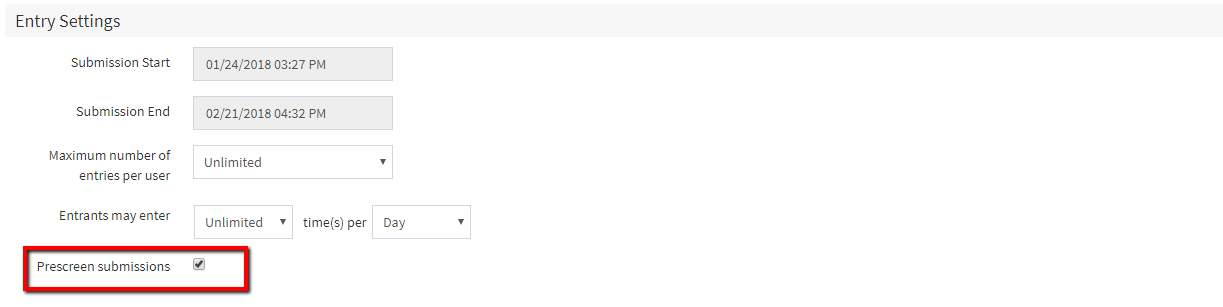
If you uncheck the prescreen submission flag then by default entrants images will get displayed on the gallery.
We understand the need of having all your leads date ported to your existing marketing software so we’ve provided options to integrate your campaign with Mailchimp, Mad Mimi, Constant Contact, Aweber, Infusionsoft and Campaign Monitor. When you integrate your campaign with one of these marketing softwares, all of your Heyo leads data will be ported to the respective email marketing lists. Please note we will only port First name, Last name and Email address.

We know sometimes you want to target your promotion to a specific country and this can be done by using our Geo-IP feature. Select countries where you would like to target your promotion and check “Restrict participation to the selected countries” flag. With this change, your promotions can only be accessed by the selected countries. This feature is available only at our Premium plan.
You can access both Data Export and Geo-IP features from the “Advanced” settings page of photo contest.
Under the “Share Settings” section of Advanced Settings page, you can edit campaign Facebook and Twitter share copies along with the individual entry share copies.
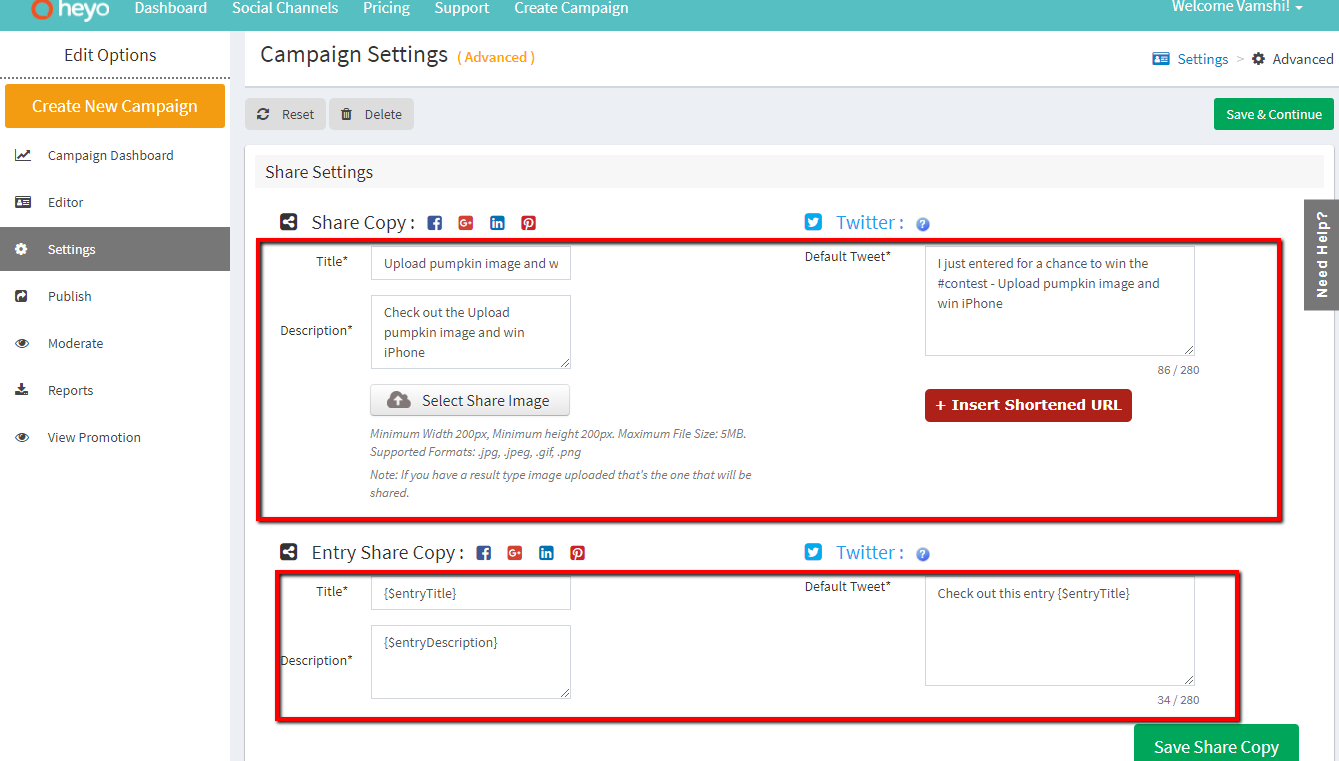
For campaign share, you can also add customized share image. Please make sure to click on “Save Share Copy” button after updating share copy details.
Facebook scrapes your campaign share data once every 24 hours. This means that if you have already published your campaign – Facebook may not immediately reflect the recent update you’ve made to yourshare settings (it will still show your old title, image, and description). However, you can force Facebook to update your campaign’s meta data by going to the following link and pasting your Smart URL in the field provided —> FACEBOOK DEBUGGER

Hit the “Debug” button and the page will populate with your campaigns metadata. Then hit “Fetch new scrape information” and this will force Facebook to pull in your new, updated information. Now, when you go to paste your campaign URL as a status update, you should see your new Campaign Title, Image, and Description!
By default we will send emails to end users in below cases :
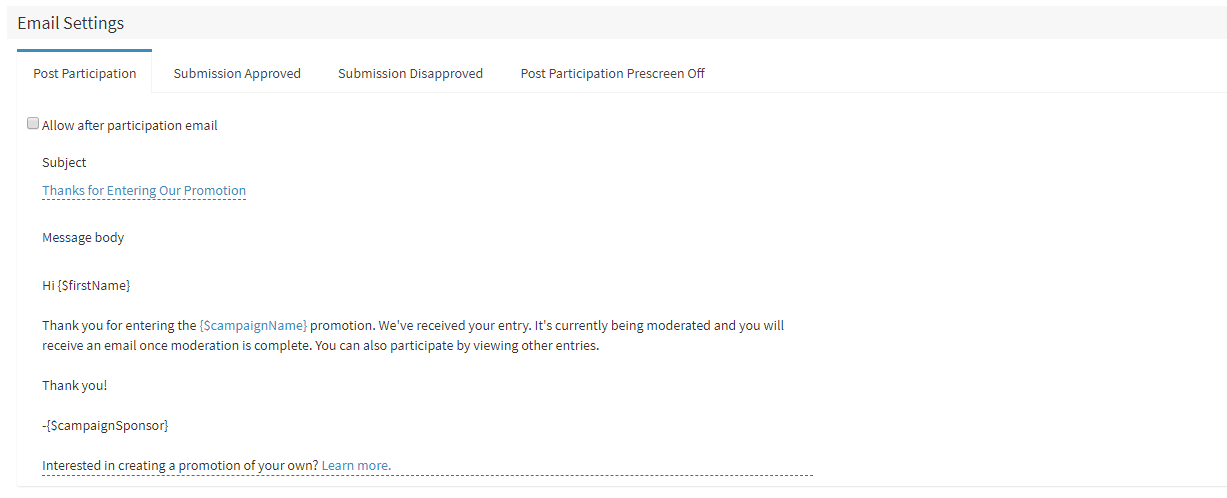
You can customize all of these emails under “Email Settings” section, which is located under the “Advanced settings” page. This feature is available only at our Premium plan.
Google Analytics is one of the most powerful tools available when it comes to monitoring traffic on your websites. It tells you where your visitors are coming from, where they are going, how they found your site, and much more; all of this is crucial information when you want to get to know your potential customers.
![]()
In the “Advanced Settings” page, under “Tracking Code ( Analytics )” section, you can add Google tracking for your campaign. Don’t forget to click on “Save & COntinue” button once you’ve added tracking code for your campaign.
Now you’re ready to publish your campaign. In the publish tab, when you publish your campaign to facebook, it’ll get published automatically to Microsite. If you want, you can always publish your campaign to one channel and unpublish from earlier channels.
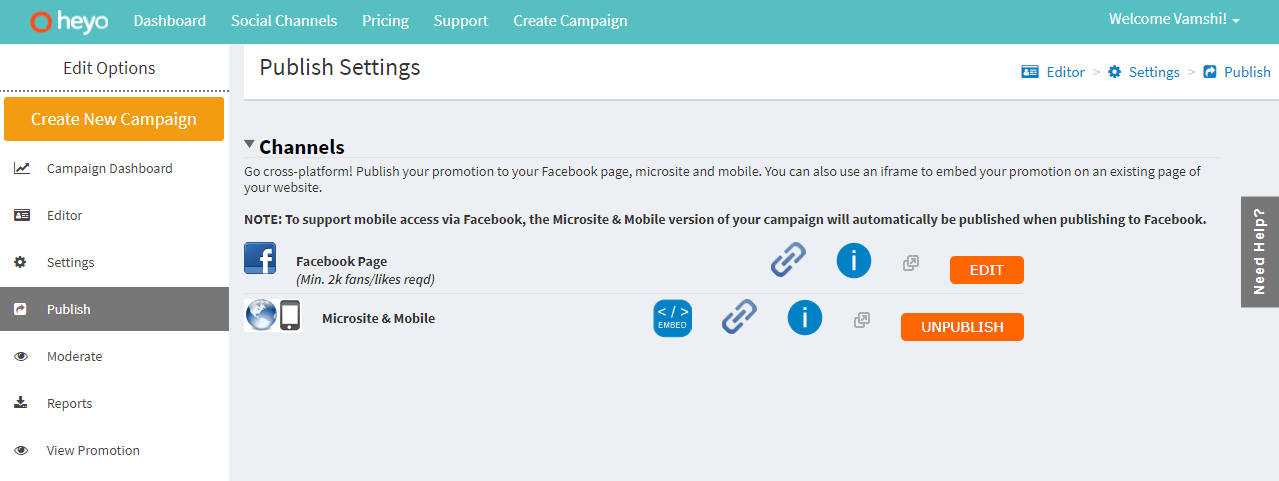
Embedding your campaign into your website or blog is very simple. Click on “Embed” button to grab the unique code for your promotion and add it on site where you want to display the promotion.
Once your Photo Contest is live, you will be able to moderate the photos submitted to your contest. From the moderate tab of contest, you can approve an entry or invalidate entry which doesn’t meet your contest requirements. When you approve an entry, it will get displayed on the contest and when you invalidate an entry, it will not get displayed on the live campaign.
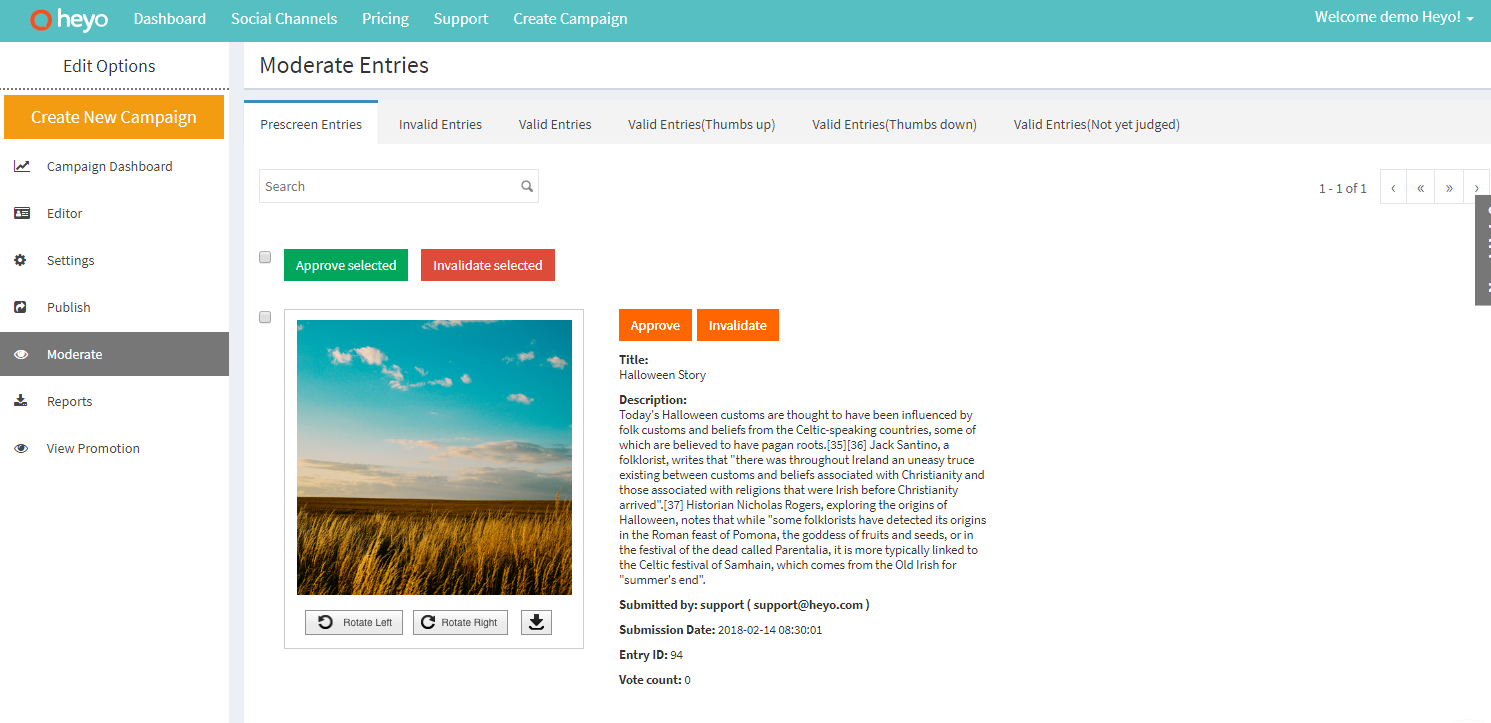
You can also download individual image and rotate it. If requires, you can even edit the title and description of an entry.
We provide inhouse analytics for your campaign as we know these are important to track and measure your campaign success. From “Campaign Dashboard” page, you can see the total no.of entries your campaign received along with the total page views count.
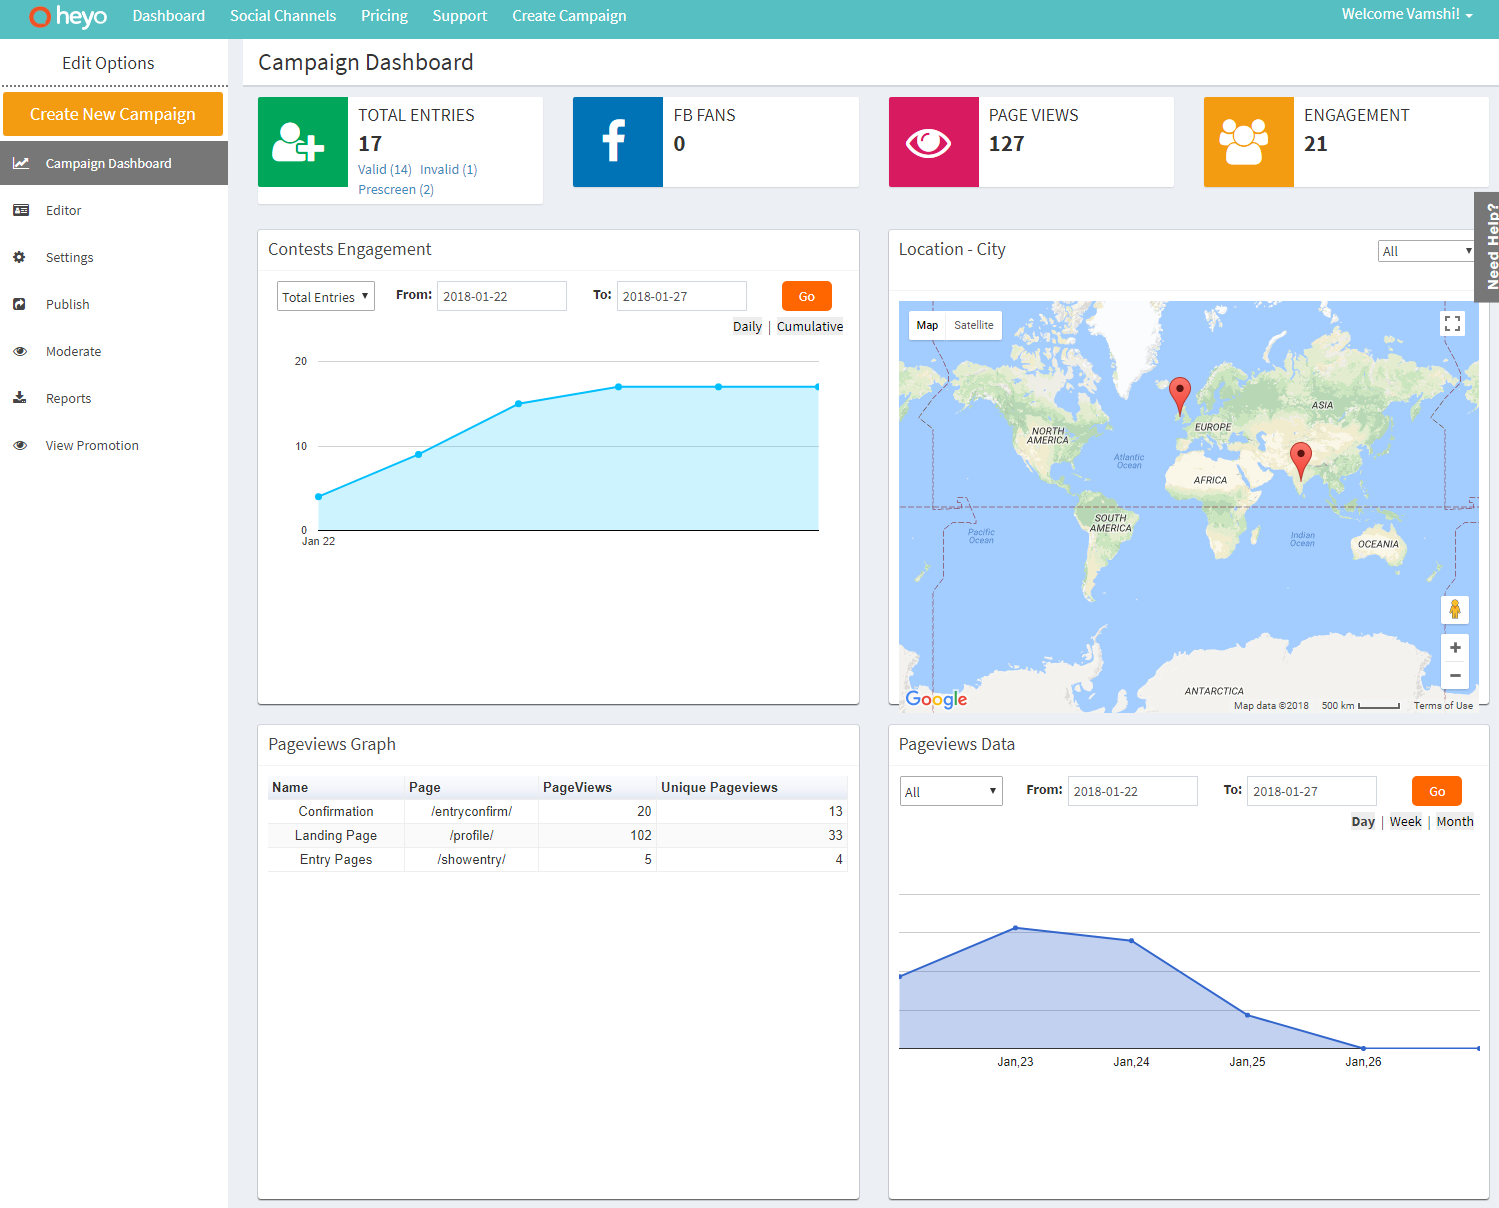
We also have individual graphs for campaign page views and engagement. You can filter this graph data by setting custom dates. Not only this, you can see from where you’re getting more traffic using our “Location – City” graph.
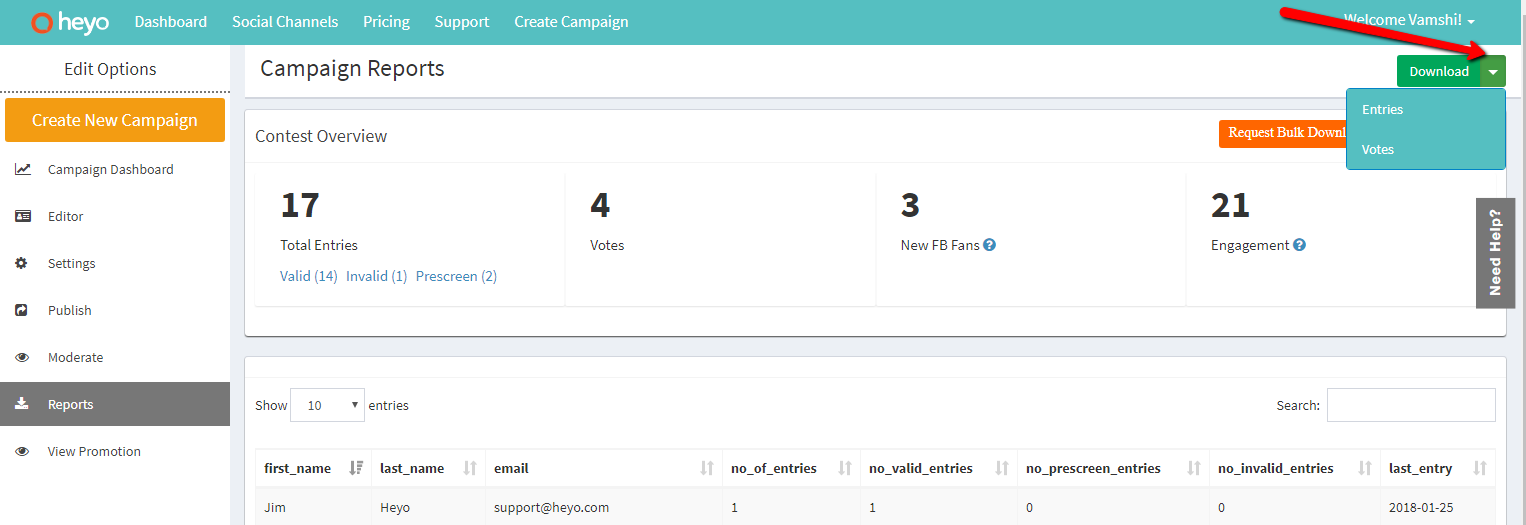
From the “Reports” page, you can download Entries and Votes data in a CSV format. Not only this; before downloading CSV file, you can see the entrant information in a table format and sort it based on total entry count, entry submission date and email.
Is there an issue I didn’t cover in this overview? Do you’ve any feature request? Contact us at support@heyo.com and we’ll help you out.


